This page is designed to introduce the use of gCADPlus in the Imperial (USA) environment by completing a simple landscape design.
![]() This movie covers the whole tutorial and shows us first drawing the footprint of a house that’s 40 feet by 35 feet. The outline of the house is offset 3 feet to form a path running around the house. We dimension one side of the house displaying the length in feet and inches using an architectural dimension style. The roof is outlined using the polar drawing tool. The front porch 6 foot 6 inches by 7 feet 9 inches to illustrate how inches are dealt with. The porch is then moved into position and a front boundary established. The design is dressed up with some plants from the symbol library and finally, the design plotted onto an architectural C size sheet with a title block.
This movie covers the whole tutorial and shows us first drawing the footprint of a house that’s 40 feet by 35 feet. The outline of the house is offset 3 feet to form a path running around the house. We dimension one side of the house displaying the length in feet and inches using an architectural dimension style. The roof is outlined using the polar drawing tool. The front porch 6 foot 6 inches by 7 feet 9 inches to illustrate how inches are dealt with. The porch is then moved into position and a front boundary established. The design is dressed up with some plants from the symbol library and finally, the design plotted onto an architectural C size sheet with a title block.
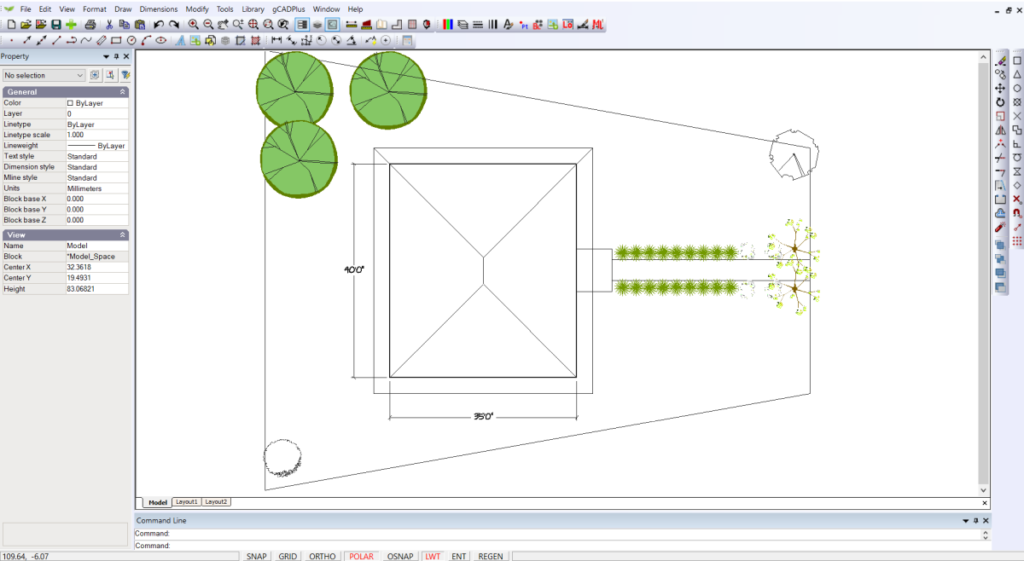
Here is a screengrab showing the finished design.
And the steps to take in detail.
Create a new drawing using the default template (File > New). Make sure that SNAP, GRID in the status line are off (not showing red) and that the POLAR switch is on. If the POLAR switch in the status line is grayed out, simply click on it to switch on. Having POLAR on means it is easy to draw lines horizontally, vertically or at 45 degrees as required in this tutorial.
Draw the footprint of a house. We will imagine a simple house, 35 feet wide by 35 feet deep (high).
![]() We use the POLAR tool to quickly draw the footprint of a house that’s 35 feet by 40 feet.
We use the POLAR tool to quickly draw the footprint of a house that’s 35 feet by 40 feet.
To do that, start the line command from the draw drop menu or from the draw toolbar. The start point can be anywhere on the screen. As shown in the movie, left click to start the first line, move off in a horizontal direction to the right by moving the mouse – make sure that the line you are about to draw stays horizontal and type 45. Now move in a downward direction again making very that the cursor shows a vertical lien and type 45 (feet). Move to the left and type 35 to draw the bottom side of the house. Finally, move up and type 45 (hit enter to set each line). Now, right-click and select exit to finish the line command. Check your work by selecting one of the lines just drawn and read the result in the properties box.
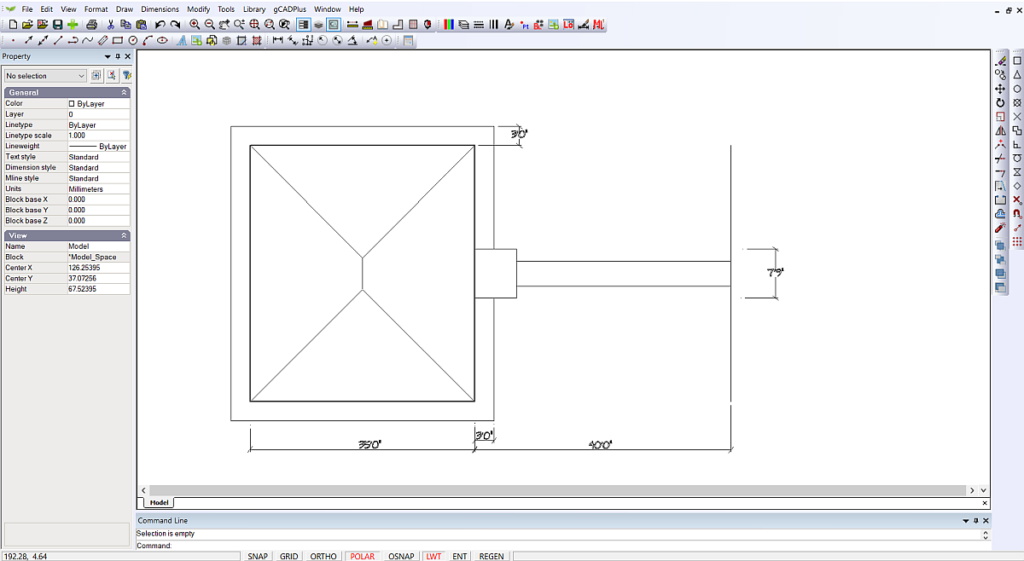
![]() Next create the path around the house using the offset command, setting an offset distance of 3 units (3 feet). In order to make the landscape plan a little more interesting, draw in the roof plan, add a porch and offset the front of the house by 40 feet to create the front boundary.
Next create the path around the house using the offset command, setting an offset distance of 3 units (3 feet). In order to make the landscape plan a little more interesting, draw in the roof plan, add a porch and offset the front of the house by 40 feet to create the front boundary.
The next step is to create a path leading from the site boundary to the front porch.
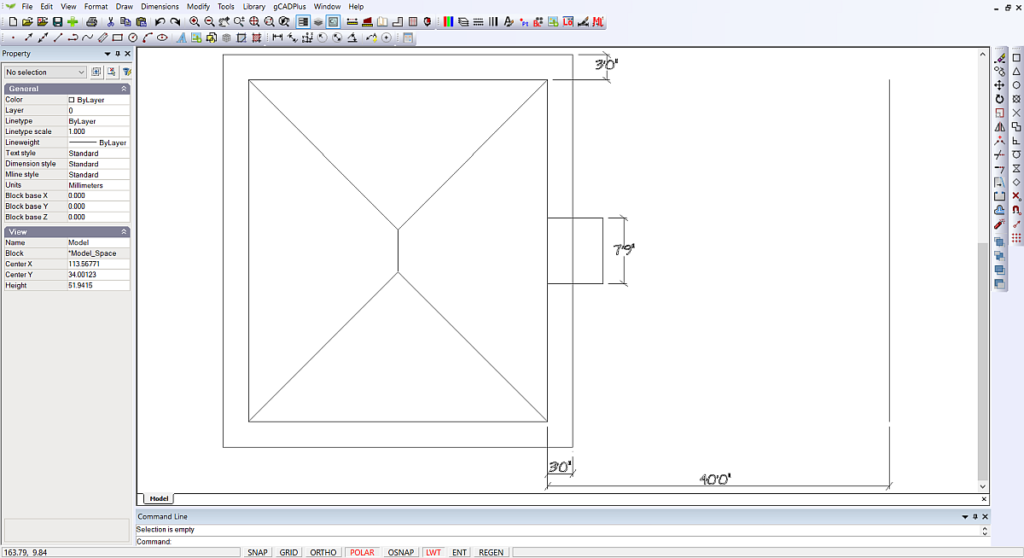
![]() After applying dimensions and changing a dimension style, we use the line command in combination with the polar switch to show a porch 6 feet 6 inches deep by 7 feet 9 inches wide. The porch is then moved into position using a combination of grips and osnaps.
After applying dimensions and changing a dimension style, we use the line command in combination with the polar switch to show a porch 6 feet 6 inches deep by 7 feet 9 inches wide. The porch is then moved into position using a combination of grips and osnaps.
![]() Let’s imagine that we have just learned that the client has a friend who uses a wheelchair. We modify the design slightly using a block from the gCADPlus symbol library.
Let’s imagine that we have just learned that the client has a friend who uses a wheelchair. We modify the design slightly using a block from the gCADPlus symbol library.
Add species symbols
Now it is time to use symbols for species and take from the gCADPlus library. We will assume that the client has requested a very formal design for his garden. For that, we can utilize the gCADPlus mirror command to good effect.
![]() We use the plant library and drag in a symbol for ornamental grass. the symbol is then copied a number of times using the gCADPlus polar tracking feature. Finally, a row of symbols is mirrored to create the beginning of formal landscape design.
We use the plant library and drag in a symbol for ornamental grass. the symbol is then copied a number of times using the gCADPlus polar tracking feature. Finally, a row of symbols is mirrored to create the beginning of formal landscape design.
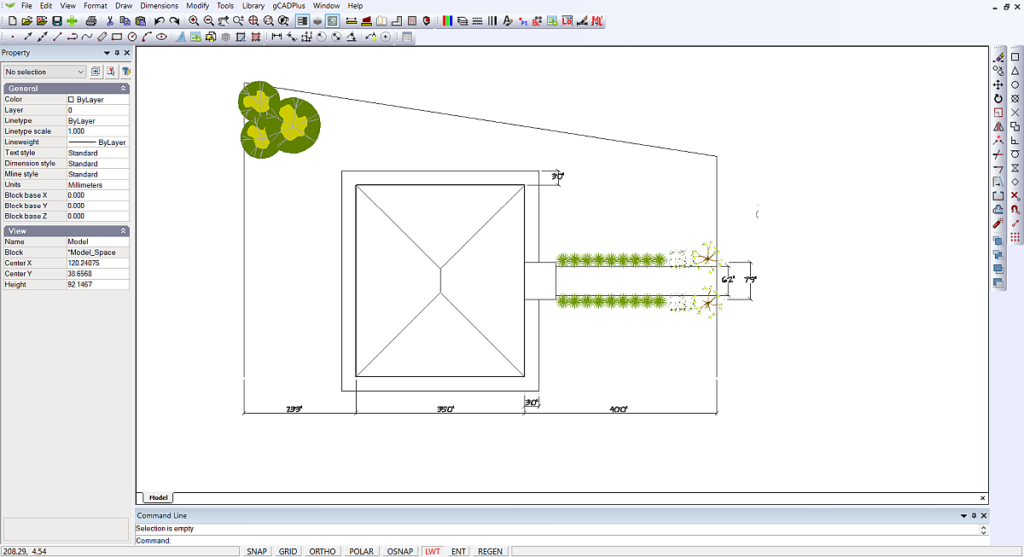
![]() Next, we add some more plants, learn to scale symbols, use the STRETCH command to lengthen a line, offset the back of the house to form a back boundary.
Next, we add some more plants, learn to scale symbols, use the STRETCH command to lengthen a line, offset the back of the house to form a back boundary.
Now is a good time to run a check print.
![]() Here we add some more symbols, create a layout on an architectural C size sheet, scale the floating viewport to a scale of 1:96, change the position of the design in a floating viewport, add a scale bar and finally run a quick check plot.
Here we add some more symbols, create a layout on an architectural C size sheet, scale the floating viewport to a scale of 1:96, change the position of the design in a floating viewport, add a scale bar and finally run a quick check plot.

The check plot is satisfactory and now it is time to return to the drawing and finish off the design.